How to Read Waves—the Right Way
Have you ever watched surfers from the beach and thought, “Wow, they make it look so easy” when they know exactly when to start paddling to catch that perfect peeler, or “Why didn’t they go for that wave?” when the sets keep passing them by.
For many people, it’s easy to think that surfing merely consists of paddling out at leisure, catching a wave as it comes in, then rinse and repeat.
But if you’re a surfer, you know there’s much more to surfing than that. The majority of your time in the water is spent either paddling (out, in, over, or for a wave) or sitting on your board, studying the horizon and looking for the right wave… or any wave.

Being able to “read” the waves is one of the most challenging skills to learn as a surfer because if you think about it, you’re trying to predict the future in an ever-changing environment. You see a bump of water in the ocean and have to anticipate what it’s going to look like in 5, 10, 15 seconds and then position yourself in juuust the right spot to be able to catch the wave.
Honestly, I think reading waves is more of an art because it’s a skill that takes years to grasp and a lifetime to master, and a big part of it relies on your own intuition.
While I wish there was a secret “trick” or shortcut to help you read waves better, the trick is just getting more practice in so you become familiar with how a good wave should look and feel. Only time and experience can tell you whether you should paddle for a wave or skip it.
But first, it’s important to know what you’re looking at so you can learn how to read a wave—the right way.

How a wave breaks: lefts, rights, A-frames, and closeouts
Different types of waves break differently and a fundamental part of reading a wave (and surfing it) is knowing what direction it’s going to go.
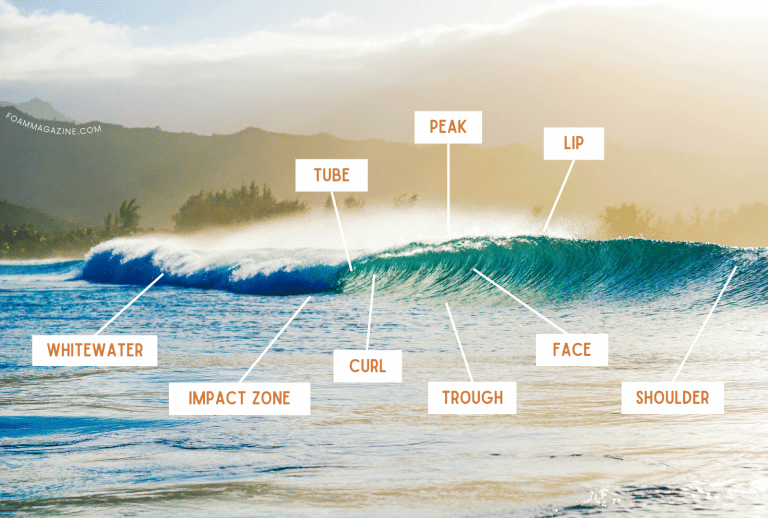
(If you aren’t familiar with all the parts of a wave yet, brush up on that first so you understand where the peak, curl, and shoulder are.)
When you see a bump on the horizon, you know that bump will eventually turn into a wave as it gets closer to shore. This wave may break into different shapes, but for most waves, they can be categorized as either a left, a right, an A-frame, or a closeout.
Left-hand wave
The first thing you should know about wave direction is that it’s always referred to from the vantage point of the surfer riding the wave.
So when we’re talking about left-hand waves (or simply, lefts), these are waves that break to your left if you’re the surfer (but to the people onshore, the wave is breaking to the right).
If you ski, this is just like going “skier’s left” or “skier’s right” down the mountain. Similarly, wave riding is always from the surfer’s perspective to avoid confusion.
Lefts are typically preferred by goofy-footed surfers as they can ride frontside (that is, looking directly at the wave face as they surf, rather than over the shoulder, which is backside).
Right-hand wave

A right-hand wave (or simply, a right) is a wave that breaks (or “peels”) to the right, from the vantage point of the surfer riding the wave.
Rights are ideal for regular-footed surfers because these waves allow them to ride frontside.
A-frame wave
Also called a split peak, an A-frame has both left and right shoulders on either side of the peak. A-frames are great (and super fun) since they can accommodate two surfers catching the same wave at the same time: one going left, and the other going right.
Or, if you’re the only surfer and you’re positioned at the peak when it starts to break, you can choose to go either direction.
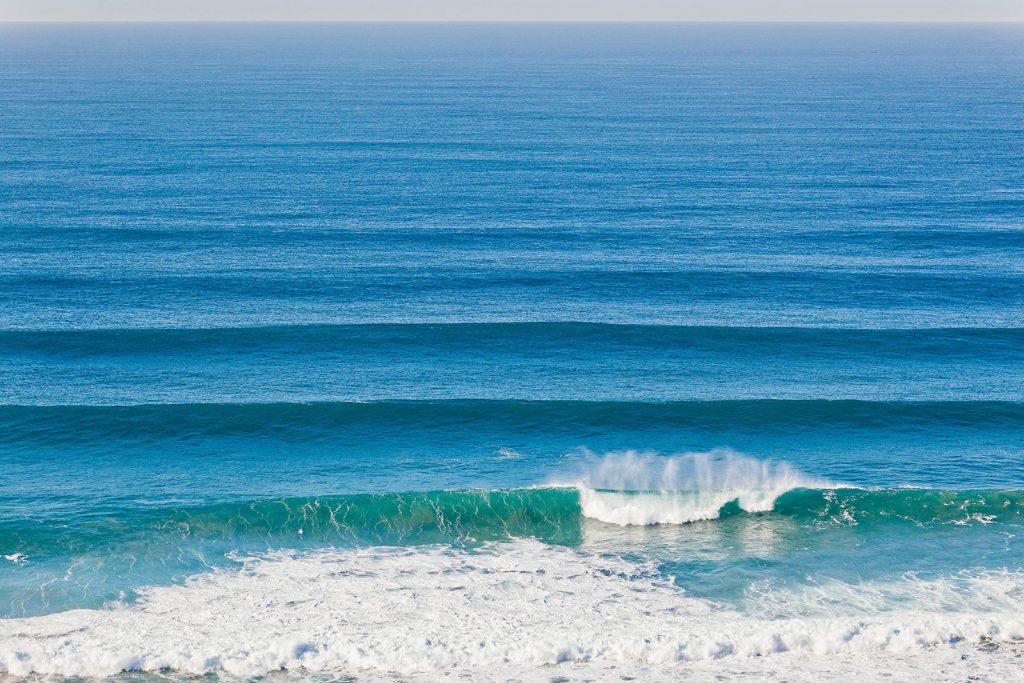
Closeout wave
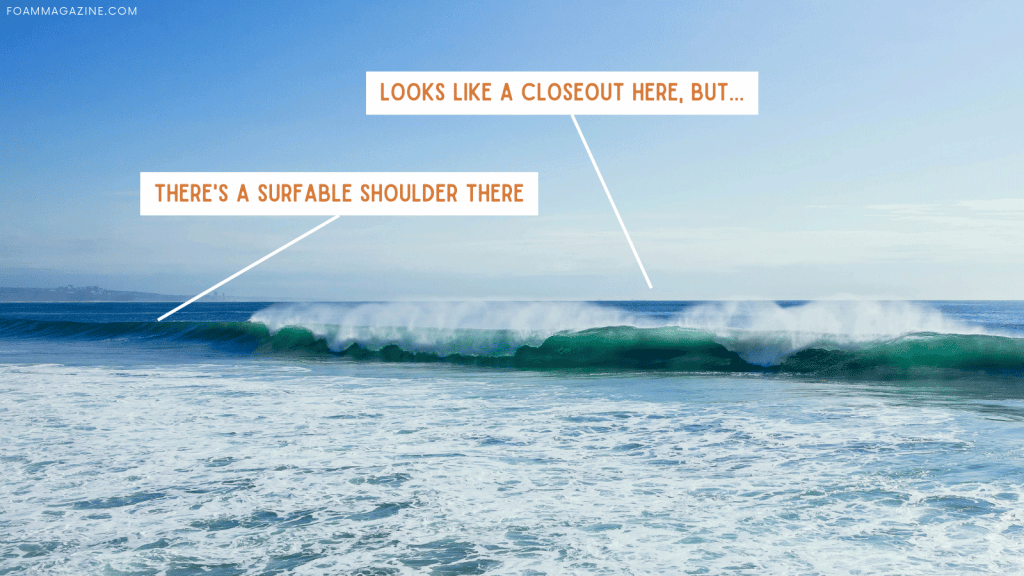
A closeout wave is exactly what it sounds like: a wave that closes all at once, and the main thing you’ll notice is the top of the wave forming straight across, almost parallel to the skyline. There are no angles and no slopes, making it impossible to surf since the whole wave just crashes simultaneously over its face.
You can still catch a closeout, but it’ll break a couple seconds after you pop up, leaving you with not many options but to ride the whitewater straight toward the beach.
But, there’s a big but: A wave that looks like a closeout might not be a closeout at all. Sometimes there will be a peak and a shoulder, and as you get more experience, you’ll be able to see them and move quickly to claim these “hidden” opportunities for waves.
How to read and catch a wave
Sometimes when I’m sitting on my board in the ocean, The Clash song pops into my head: Should I stay or should I go?
It’s a familiar feeling for many: waiting in the water, unsure whether to go for this set or the next set of waves. But with experience, you’ll realize that the best time to go for a wave is before it looks like a wave, giving you time to paddle into the proper position.
Here’s the easiest way to read a wave:
- As you’re sitting on your surfboard, look at the horizon line.
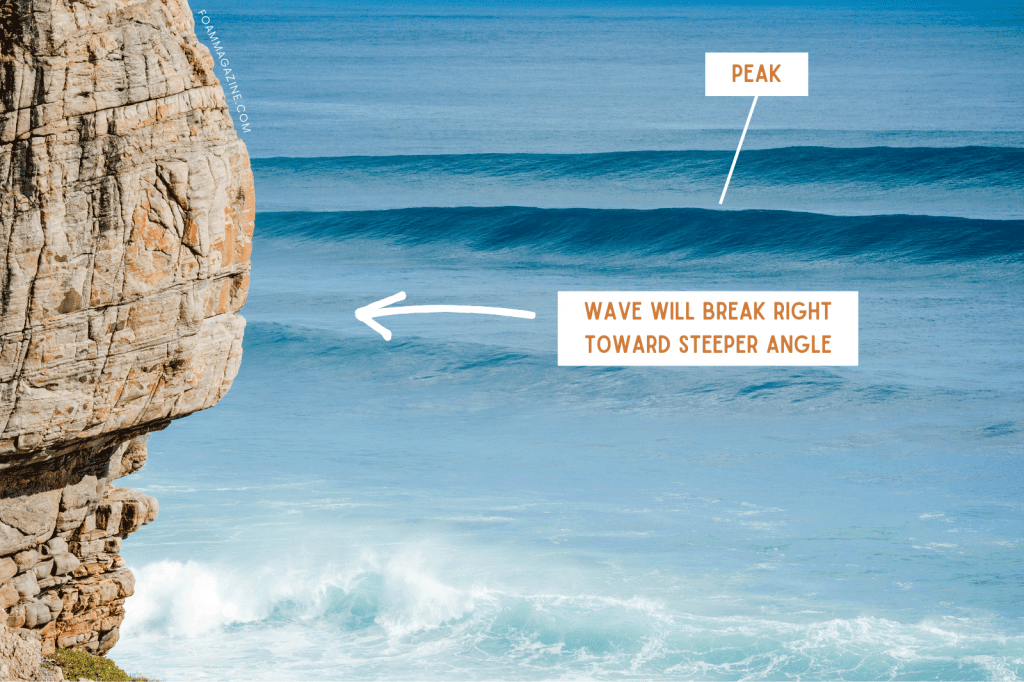
- When you see a bump in the ocean farther out, try to find the peak—this will be the highest point on the wave, and the first place where the wave breaks.
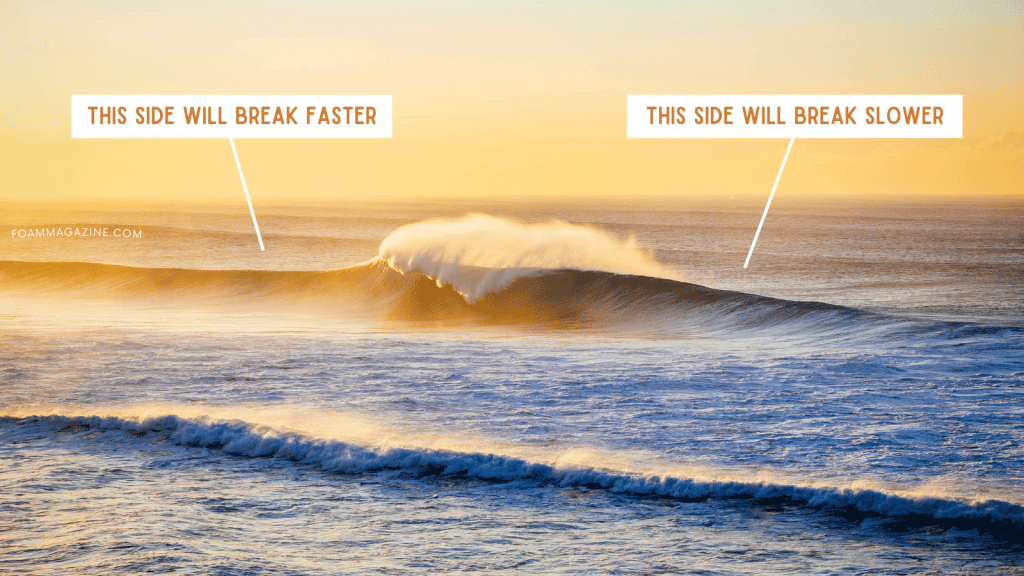
- Compare the angle of the wave with the skyline. The side of the wave with the steeper angle is the direction the wave will break, so that’s the direction you’ll surf. (If there’s no distinct angle on either side of the peak, then the wave will most likely be a closeout.)
- If an A-frame wave is coming with nobody else going for it, choose the shoulder with the steeper angle. The steeper this angle goes down, the slower the wave will break, giving you a longer ride. The straighter this angle looks, the faster the wave will break and the sooner it’ll close out on you.
Next, to catch the wave:
- The sooner you identify the peak, the better. You need to act fast and start paddling into position to catch the wave—ideally reaching the peak before it breaks so you can get a longer ride.
- If the wave is bigger and you can’t make it to the peak before it breaks, paddle onto the shoulder. This is where the wave is steep enough to catch, but the lip hasn’t started to pitch yet.
- Once you’re in the proper position to catch the wave, turn around so your surfboard faces the beach.
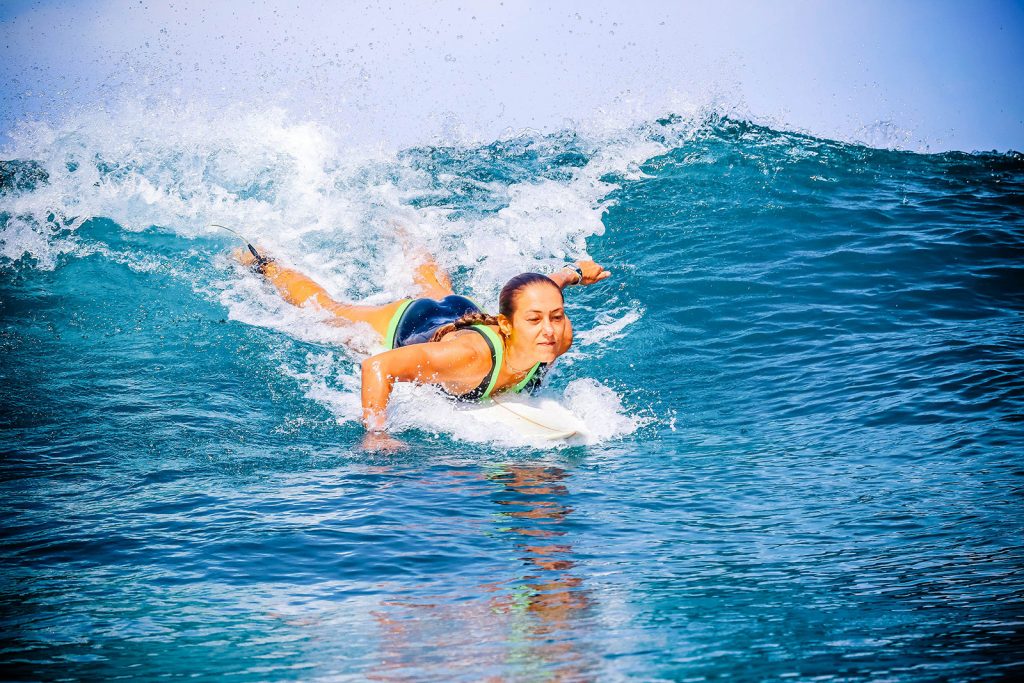
- Paddle with deep, fast strokes so you can begin building momentum and matching the speed of the wave. Look over your shoulder as you paddle to gauge what the wave is doing and adjust your positioning or paddling accordingly. The goal is to get on the wave as early as possible when it’s not as steep and critical, giving you time to pop up and set your line.
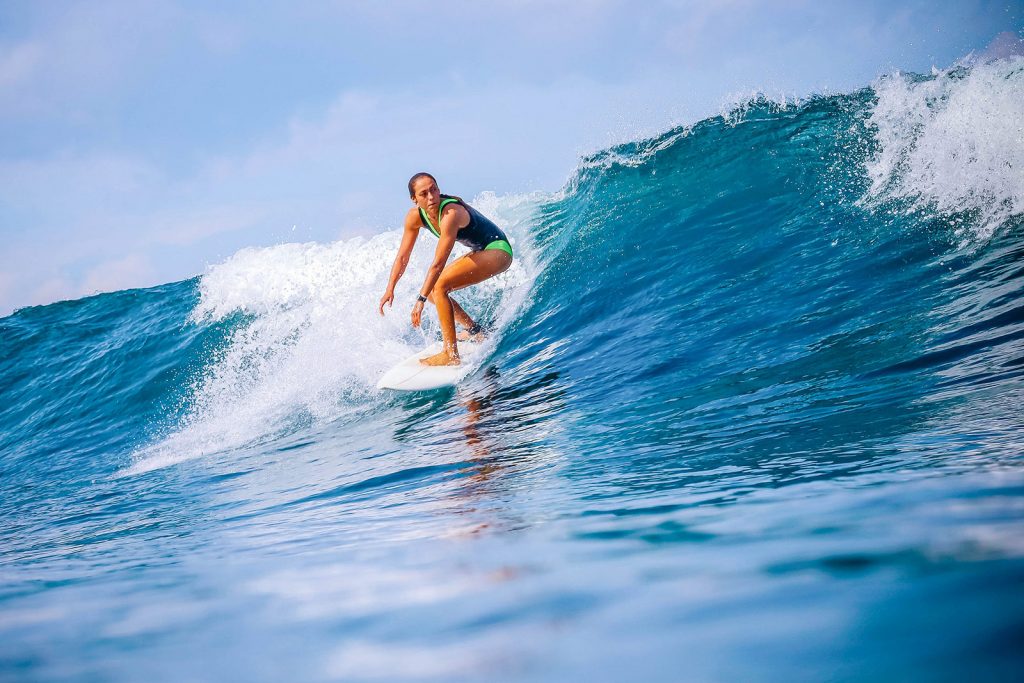
- As you feel yourself being picked up and carried forward by the wave, give a few more hard paddle strokes and then stand up. Don’t stop paddling too soon, as you could lose momentum and miss the wave completely.
What if you miss the wave?
If you missed the wave and it just rolled under you because you weren’t in the right spot, paddled too slow or paddled too late, the safest place to be is behind the waves, in the deeper part of the water. Paddle where you need to so you stay out of the impact zone, and keep studying the set as it rolls in.
Look at how and where each wave breaks. You’ll notice that each set of waves has its nuances—a bump might look promising but there’s a smaller bump just in front of it that keeps it from breaking. The wave might trick you and look like it’s about to break but then it just backs off. There might be two or more swells in the water that jumble the sets.
Noticing all of these nuances is what makes reading the waves such an art form. Keep at it, try to find the ideal take-off spot, then get into position for the next one.
More tips for reading waves
Before anything else, know what type of surf break you plan to surf and what the ideal swell and tide conditions are for that spot. Check the local surf forecast, find out what the winds and wave period are doing, and make sure the waves are within your ability level.
Take your time once you get there and pay attention to the environment around you. Sit on the beach and study the way the waves break, where they break, and how they break. Determine how often the set waves come and how many waves are in each set.
Surfing involves a lot of observation, patience, and practice, and more often than not, you’re probably spending 90 percent of your time in the water sitting on your board, waiting for the wave. But once you learn to read waves more effectively, you’ll catch more of them, improve your technique, and enjoy surfing that much more!